Step 1. [ Open Settings ]
|
- |
Tap the 'Settings' icon |
|

|
Step 2. [ Open Mail, Contacts, Calendars ]
|
- |
Tap the 'Mail, Contacts, Calendars' settings option
|
|

|
Step 3. [ Add Account... ]
|
- |
Tap the 'Add Account...' option |
|

|
Step 4. [ Other ]
|
- |
Tap the 'Other' option at the bottom of the list |
|

|
Step 5. [ Add Mail Account ]
|
- |
Tap the 'Add Mail Account' option |
|

|
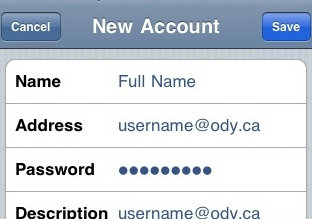
Step 6. [ New Account ]
|
- |
Type in your name |
|
- |
Type in your Odynet email address |
|
- |
Type in your Odynet password |
|
- |
Tap the 'Save' button |
|
|
Step 7. [ New Account (con't) ]
|
- |
Tap the 'POP' button ** VERY IMPORTANT ** |
|

|
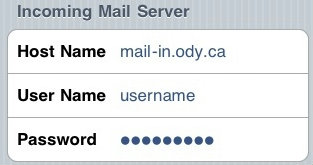
Step 7b. [ New Account (Incoming Mail Server) ]
|
- |
Scroll down and enter 'Host Name': mail-in.ody.ca |
|
- |
Type in your 'User Name' (email address WITHOUT @ody.ca) |
|
|
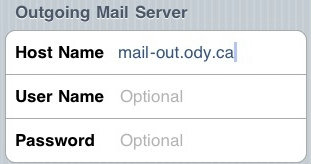
Step 7c. [ New Account (Outgoing Mail Server) ]
|
- |
Scroll down and enter 'Host Name': mail-out.ody.ca |
|
- |
Tap the 'Save' button in the top right corner |
|
|
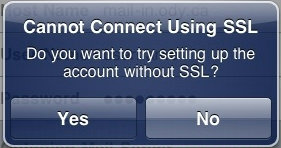
Step 7d. [ New Account (SSL Warning) ]
|
- |
When the SSL warning message pops up, tap 'Yes' |
|
- |
If the SSL warning pops up a second time, tap 'Yes' again |
|
|
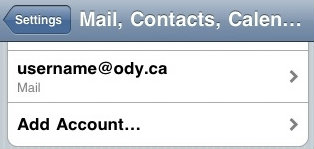
Step 8. [ Edit Mail Account ]
|
- |
Tap the account we just set up |
|
|
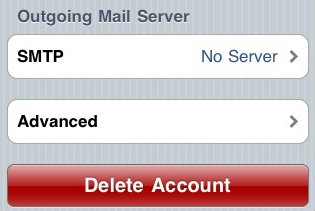
Step 9. [ Edit SMTP Server ]
|
- |
Scroll down and tap on 'SMTP' under Outgoing Mail Server |
|
|
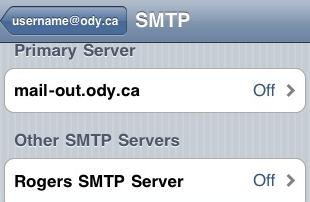
Step 10. [ Change SMTP Server ]
|
- |
Make sure the 'mail-out.ody.ca' server is set to 'Off' |
|
- |
Tap on your cellphone's SMTP Server option
(Rogers, in this case)
** If your cellphone provider does not include a SMTP server, please contact them to set one up ** |
|
|
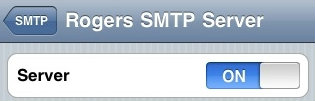
Step 11. [ Turn on Cellphone's SMTP Server ]
|
- |
Tap the 'On/Off' switch to make sure it reads 'On' |
|
- |
Tap the 'SMTP' button in the top left corner to complete |
|
|