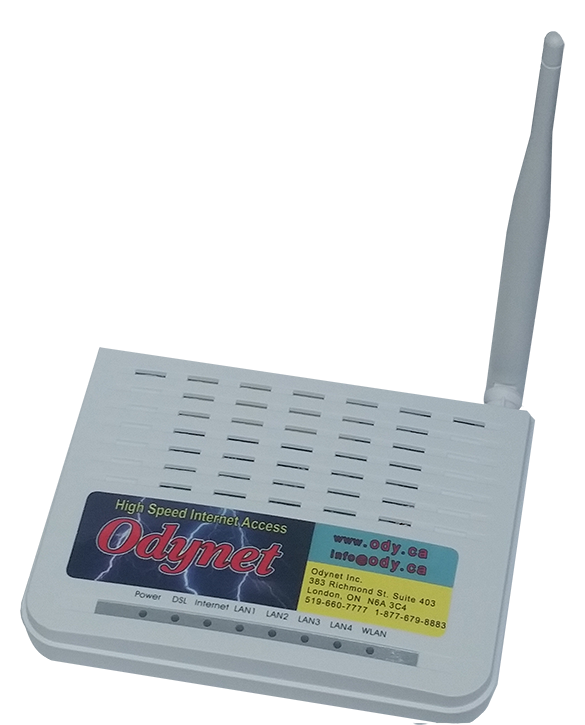
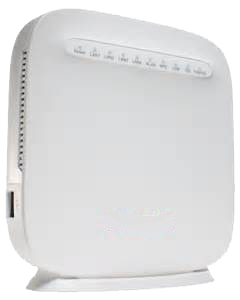
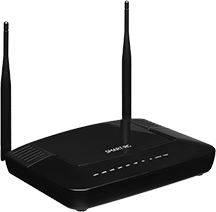
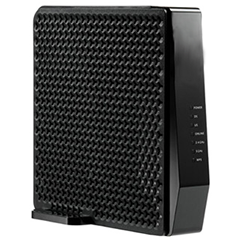
Please select the modem on the left for support options for that type of device
This will provide you with the basic steps through settings required to configure the modem to connect with Odynet.
If using a 3rd party router, consult your router's user manual for assistance in finding the equivalent settings.
For best results, if possible connect a device with an Internet browser directly to the modem via Ethernet cable.
- Open a browser, and navigate to '192.168.1.1', a prompt for username & password will appear.
- By default, enter username 'admin' and password 'admin'
- Choose 'Interface Setup' from the top menu, this loads the Internet login settings page.
- Under 'Encapsulation' select the dot beside 'PPPoA/PPPoE' to begin setting up a PPPoE type connection.
- Configure the router with the following PPPoE settings
- Username: The Odynet username, ending in @ody.ca.
- Password: The password to the Odynet account supplied at sign up.
- An important setting to ensure is selected is 'Connection', confirm it is set to 'Always On (Recommended)'.
- On the bottom of the page, click 'Save' to complete.
The device will reboot, allow 30-120 seconds for it to initialize, the device should connect once it completes.
From time to time you may need to change your wireless password or the network name it broadcasts
This will provide the basic steps through settings to configure the wireless network details
For best results, if possible connect a device with an Internet browser directly to the modem via Ethernet cable.
- Open a browser, and navigate to '192.168.1.1', a prompt for a username & password will appear.
- By default, enter username 'admin' and password 'admin'
- Choose 'Interface Setup' on the top menu then choose 'Wireless' under the sub-menu below.
- Under 'Multiple SSIDs Settings' confirm the 'Authentication Type' drop down is set to 'WPA-PSK/WPA2-PSK' to enable.
To change the wireless password:
- Locate the 'Pre-Shared Key' text box below, then enter the new password.
- If done with changes, click 'Save' at the bottom of the page.
To change the wireless network name:
- Locate the text box under 'Multiple SSIDs Settings' labeled 'SSID:'
- Erase the current info and enter a new one (minimum of 8; maximum of 63 ASCII characters).
- Click 'Save' at the bottom of the page to apply the new network name.
Your device's operating system will vary on how specifically to scan for the new wireless network.
To re-connect the device, scan for wireless networks, choose the network, the device may request the password if changed, enter the new password to connect.
From time to time you may need to change your wireless channel to help alleviate wireless interference/signal issues.
This will provide the basic steps through settings to view and change the wireless broadcast frequency.
For best results, if possible connect a device with an Internet browser directly to the modem via Ethernet cable.
- Open a browser, and navigate to '192.168.1.1', a prompt for a username & password will appear.
- By default, enter username 'admin' and password 'admin'
- Choose 'Interface Setup' on the top menu then choose 'Wireless' under the sub-menu below.
- To change the wireless channel, choose the drop down after the country drop down to reveal the static channels.
- Select a channel from 1 to 11 to manually set the channel to that frequency.
- To have the modem decide which is best to use, leave the channel set to 'Auto'.
- Click 'Save' at the bottom of the page to set the new wireless channel.
Under 'Access Point Settings' you will see a line that contains the channel country, setting and currently set channel.
If currently using Ethernet to configure, disconnect it and allow the device to re-connect to the wireless.
Helpful Tip:
It may require some trial and error to find a clear channel depending on the area/surroundings.Typically try to choose a channel frequency opposite from its troubled channel frequency.
As an example; if currently set to channel 11, try setting to channel 1.
If the wireless issues persist, repeat the steps above to attempt to find a clear channel.
Most devices will re-connect, if it does not re-join the network, re-select the connection on the device to reconnect.
If you are unable to resolve the issue on any channel, contact support for advanced troubleshooting.
This will provide you with the basic steps through settings required to configure the modem to connect with Odynet.
If using a 3rd party router, consult your router's user manual for assistance in finding the equivalent settings.
For best results, if possible connect a device with an Internet browser directly to the modem via Ethernet cable.
- Open a browser, and navigate to '192.168.1.1'.
- Click on 'Manage Gateway (advanced)', a prompt for username & password should appear.
- By default, enter username 'admin' and password 'admin'
- Choose 'Advanced Setup' then 'WAN Service' from sub-menu. The right hand table should have no entries.
- NOTE: To remove entries, check the "Remove" box and then click the Remove button.
- Click 'Add' to continue setting up the login information
- Under 'WAN Service Interface Configuration' select 'ptm0/(0_1_1)' from the drop down, then click 'Next'.
- Under 'WAN Service Configuration' choose 'PPP over Ethernet (PPPoE)'.
- Enter '0' for '802.1P Priority [0-7]'
- Enter '35' for '802.1Q VLAN ID'
- Click 'Next' to configure the router with the following PPPoE settings:
- PPP Username: The Odynet username, ending in @ody.ca.
- PPP Password: The password to the Odynet account supplied at sign-up.
- Click 'Next' to continue, and again 'Next' for both Gateway Interface and DNS Server screens to leave defaults.
- On the final page 'WAN Setup - Summary' click 'Apply/Save' to confirm and save settings.
The device will reboot, allow 30-120 seconds for it to initialize, the device should connect once it completes.
From time to time you may need to change your wireless password or the network name it broadcasts
This will provide the basic steps through settings to configure the wireless network details
For best results, if possible connect a device with an Internet browser directly to the modem via Ethernet cable.
- Open a browser, and navigate to '192.168.1.1'.
- Click on "Manage Gateway (advanced)", a prompt for username & password should appear.
- By default, enter username 'admin' and password 'admin'
- Choose 'Wireless' on the top menu then choose 'Security' under the sub-menu below.
- Under 'Manual Setup AP' confirm the 'Network Authentication' drop down is set to 'Mixed WPA2/WPA-PSK'.
To view & change the wireless password:
- Locate the 'WPA passphrase" text box.
- Use "Click here to display" to show the current wireless passphrase.
- To change, simply erase the text box contents and type the new password, to verify use the previous step.
- To save the changes, simply click 'Apply/Save'.
To change the wireless network name:
- Choose 'Basic' under the 'Wireless' sub-menu.
- Locate the "SSID" text box under the check boxes
- Erase the current info and enter a new one (minimum of 8; maximum of 63 ASCII characters).
- Click 'Apply/Save' at the bottom of the page to apply the new network name.
Your device's operating system will vary on how specifically to scan for the new wireless network.
To re-connect the device, scan for wireless networks, choose the network, the device may request the password if changed, enter the new password to connect.
From time to time you may need to change your wireless channel to help allieviate wireless interference/signal issues.
This will provide the basic steps through settings to view and change the wireless broadcast frequency.
For best results, if possible connect a device with an Internet browser directly to the modem via Ethernet cable.
- Open a browser, and navigate to '192.168.1.1'.
- Click on "Manage Gateway (advanced)", a prompt for username & password should appear.
- By default, enter username 'admin' and password 'admin'
- Under 'Wireless' select 'Advanced' from the sub-menu.
- To change the wireless channel, choose the drop down labeled 'Channel' to reveal the static channels.
- Select a channel from 1 to 11 to manually set the channel to that frequency.
- To have the modem decide which is best to use, leave the channel set to 'Auto'.
- Click 'Apply/Save' at the bottom of the page to set the new wireless channel.
If currently using Ethernet to configure, disconnect it and allow the device to re-connect to the wireless.
Helpful Tip:
It may require some trial and error to find a clear channel depending on the area/surroundings.Typically try to choose a channel frequency opposite from its troubled channel frequency.
As an example; if currently set to channel 11, try setting to channel 1.
If the wireless issues persist, repeat the steps above to attempt to find a clear channel.
Most devices will re-connect, if it does not re-join the network, re-select the connection on the device to reconnect.
If you are unable to resolve the issue on any channel, contact support for advanced troubleshooting.
From time to time you may need to change your wireless password or the network name it broadcasts
This will provide the basic steps through settings to configure the wireless network details
For best results, if possible connect a device with an Internet browser directly to the modem via Ethernet cable.
If the model has a 5Ghz network also (i.e. SR808), the procedures are the same for both networks
- Open a browser, and navigate to '192.168.100.1', a prompt for username & password should appear.
- By default, enter username 'admin' and the password located underneath the device (case sensitive).
To access settings, Choose 'Wireless' on the top menu then choose 'Primary Network' under the sub-menu below.
To view & change the wireless password:
- Locate the 'WPA Pre-Shared Key" text box.
- Use "Show Key" check box to show the current wireless passphrase.
- To change, simply erase the text box contents and type the new password.
- Click 'Apply' at the bottom of the page to apply the new password
To change the wireless network name:
- Locate the 'Network Name (SSID)' text box
- Erase the current info and enter a new one (minimum of 8; maximum of 63 ASCII characters).
- Click 'Apply' at the bottom of the page to apply the new network name.
Your device's operating system will vary on how specifically to scan for the new wireless network.
To re-connect the device, scan for wireless networks, choose the network, the device may request the password if changed, enter the new password to connect.
From time to time you may need to change your wireless channel to help alleviate wireless interference/signal issues.
This will provide the basic steps through settings to view and change the wireless broadcast frequency.
For best results, if possible connect a device with an Internet browser directly to the modem via Ethernet cable.
If the model has a 5Ghz network also (i.e. SR808), the procedures are the same for both networks
- Open a browser, and navigate to '192.168.100.1', a prompt for username & password should appear.
- By default, enter username 'admin' and the password located underneath the device (case sensitive).
To access settings, Choose 'Wireless' on the top menu then choose 'Radio' under the left menu below.
- To change the wireless channel, choose the drop down labeled 'Control Channel' to reveal the static channels.
- The current channel is listed to the right, select a channel from 1 to 11 to manually set the channel frequency.
- To have the modem decide which is best to use, leave the channel set to 'Auto'.
- Click 'Apply' at the bottom of the page to set the new wireless channel.
If currently using Ethernet to configure, disconnect it and allow the device to re-connect to the wireless.
Helpful Tip:
It may require some trial and error to find a clear channel depending on the area/surroundings.Typically try to choose a channel frequency opposite from its troubled channel frequency.
As an example; if currently set to channel 11, try setting to channel 1.
If the wireless issues persist, repeat the steps above to attempt to find a clear channel.
Most devices will re-connect, if it does not re-join the network, re-select the connection on the device to reconnect.
If you are unable to resolve the issue on any channel, contact support for advanced troubleshooting.
From time to time you may need to change your wireless password or the network name it broadcasts
This will provide the basic steps through settings to configure the wireless network details
For best results, if possible connect a device with an Internet browser directly to the modem via Ethernet cable.
It is recommended to use the same password for your 2.4Ghz WiFi and 5Ghz WiFi for ease.
- Open a browser, and navigate to '192.168.0.1', a page for username & password should appear.
- By default, enter username 'cusadmin' and password 'password' as shown on the rear label of the device.
- Choose 'Wireless' from the top menu bar to open the appropriate settings.
To change Wireless password for 2.4Ghz and 5Ghz network:
- Choose the 'WPS & Security' to change your network pass phrase (WiFi Key/Password).
- Click the network name on the right side to select between the 2.4Ghz and 5Ghz network.
- The current password is shown in the 'Pass Phrase' text box, erase and enter a new password.
- (minimum of 8; maximum of 63 ASCII characters).
- Once completed, click 'Save Changes' to apply the new password(s).
To change the network name for 2.4Ghz and 5Ghz network:
- Choose 'Basic Settings' to view the current wireless information.
- Choose either 2.4Ghz or 5Ghz tab to change the appropriate network band.
- Erase 'Network Name (SSID)' text box and type in the information for the WiFi name.
- Once done, click 'Save Changes' to finalize.
From time to time you may need to change your wireless channel to help alleviate wireless interference/signal issues.
This will provide the basic steps through settings to view and change the wireless broadcast frequency.
For best results, if possible connect a device with an Internet browser directly to the modem via Ethernet cable.
- Open a browser, and navigate to '192.168.0.1', a page for username & password should appear.
- By default, enter username 'cusadmin' and password 'password' as shown on the rear label of the device.
- Choose 'Wireless' from the top menu bar to open the appropriate settings.
To change Wireless channel for 2.4Ghz or 5Ghz network:
- Choose 'Basic Settings' to view the current wireless information.
- Choose either 2.4Ghz or 5Ghz tab to change the channel for the appropriate network.
- To change, choose the drop down labeled 'Wireless Channel' to reveal the available channels.
- If set to 'Auto (#)' the channel is shown in the brackets, select a channel to manually set the channel frequency.
- To have the modem decide which is best to use, leave set to 'Auto (#)'.
- Once done, click 'Save Changes' to finalize.
If currently using Ethernet to configure, disconnect it and allow the device to re-connect to the wireless.
Helpful Tip:
It may require some trial and error to find a clear channel depending on the area/surroundings.Typically try to choose a channel frequency opposite from its troubled channel frequency.
As an example; if currently set to channel 11, try setting to channel 1.
If the wireless issues persist, repeat the steps above to attempt to find a clear channel.
Most devices will re-connect, if it does not re-join the network, re-select the connection on the device to reconnect.
If you are unable to resolve the issue on any channel, contact support for advanced troubleshooting.