Configure modem to PPPoE Connection
This walkthrough will provide you with the settings required to re-configure the modem to connect with Odynet.
If using a 3rd party router consult your router's user manual for assistance in finding the equivalent settings.
*Note: For best results, if possible connect the device directly to the router via Ethernet cable.
Click HERE to download the PDF version.
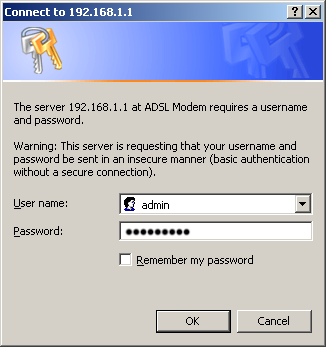
Step 1: Access the modem

A prompt for username and password will appear.
By default, username is 'admin' and password is 'admin'
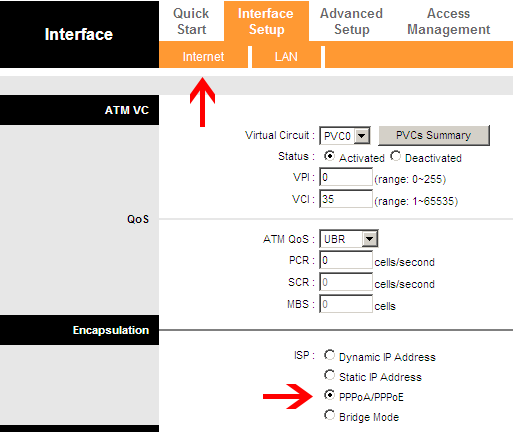
Step 2: Navigate the Configuration page
Choose 'Interface Setup' from the menu
The screen defaults to your Internet settings.
Click the radio button beside 'PPPoA/PPPoE' to begin setting up a connection.
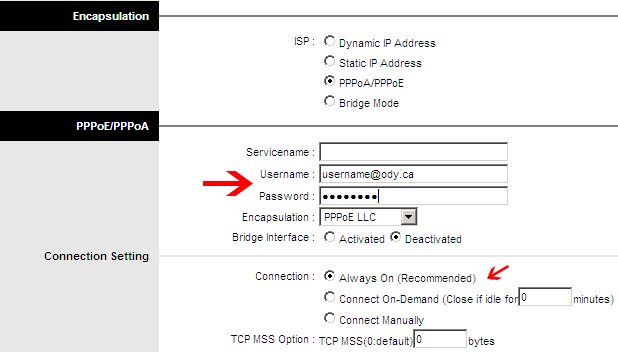
Step 3: Setting the PPPoE Settings
After the page refreshes, new options will appear, this will include the area to enter the PPPoE information.
If the device was already set to PPPoA/PPPoE proceed to entering account information in the next step.
Configure the router with the following PPPoE settings
Username: Odynet username, ending in @ody.ca
Password: The password to Odynet account supplied at signup
Step 4: Save Settings
On the bottom of the page, click 'Save' to complete.
