Following are the steps changing the Wireless password and/or Network Name:
*Note: For best results, if possible connect the device directly to the router via Ethernet cable.
Click HERE to download the PDF version.
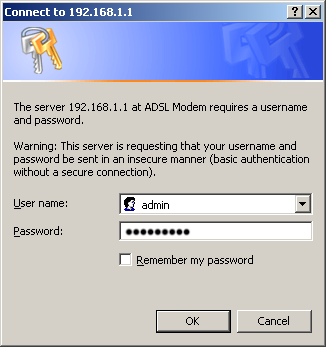
Step 1: Access the modem
Open a browser, and navigate to 192.168.100.1

By default, the username should be 'admin'
The password is located on the label underneath the device.
Step 2: Access Wireless Security Settings
Once logged in, Choose 'Wireless' on the top option bar

Choose "Primary Network" on the left menu
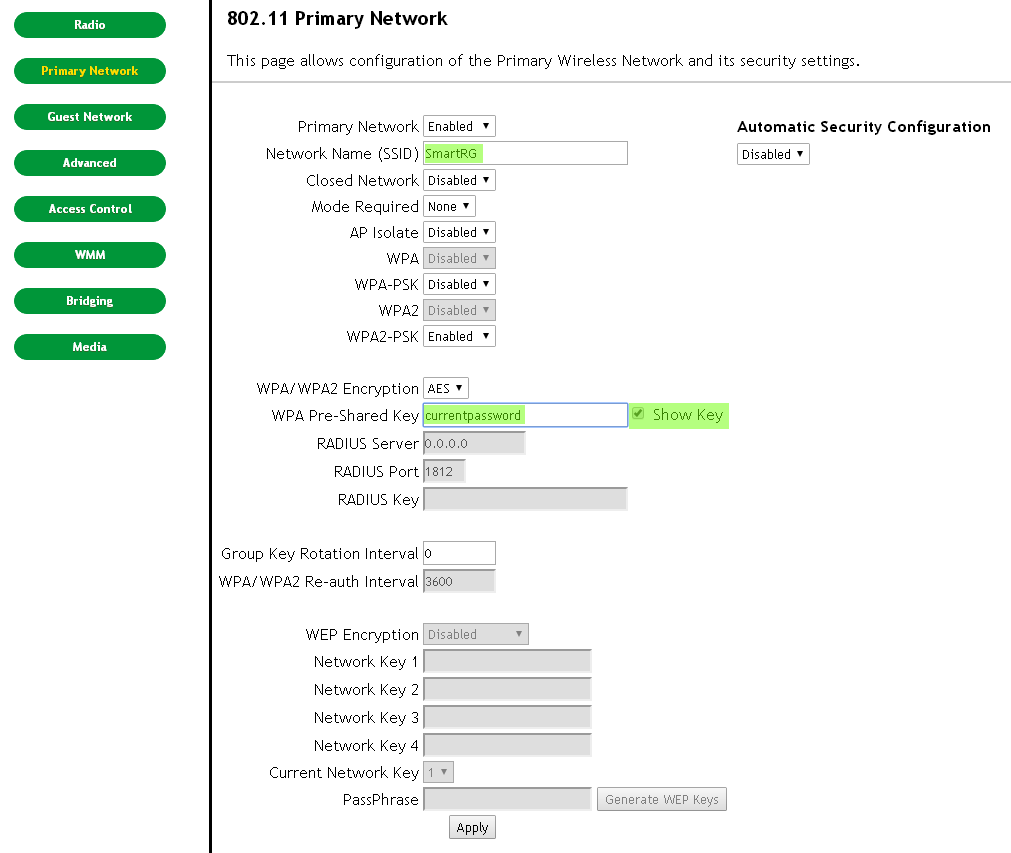
To view/change the current wireless password
To show the current 'Wireless password', check the 'Show Key' box to reveal the current Pre-Shared Key.
If any changes were made, Hit 'Apply/Save' and the router will broadcast the new information.
If no changes were made, skip this step and continue to connect to the wireless.
Note this for your records as this is what you will be using to connect wireless on all devices.
Optional: Change the "Network Name" or SSID
To change the current "Network Name" also known as the 'SSID', erase the current name and enter a new one in the "Network Name (SSID)" field.
Click 'Apply' to make changes and connect using the new network name.
To connect/re-connect to the WiFi Network
Your device's operating system will vary on how specifically to scan for wireless networks.
To begin, scan for wireless networks, Your wireless network should be listed as an option, upon choosing the network your device may ask you for a password.
Enter the password/key for the wireless router and connect.